
AI Living Room Lighting Design: How to Layer Light Like a Pro (and Test It Before You Buy)
Great living room lighting is never one ceiling fixture — it is three layers of light working together, and now you can preview the whole scheme on a photo of your own room. This guide walks through the layers, fixtures, color temperature and dimming that make a space feel finished, according to the U.S. Department of Energy’s lighting design guidance, then shows how an AI living room design tool renders it before you spend a dollar.
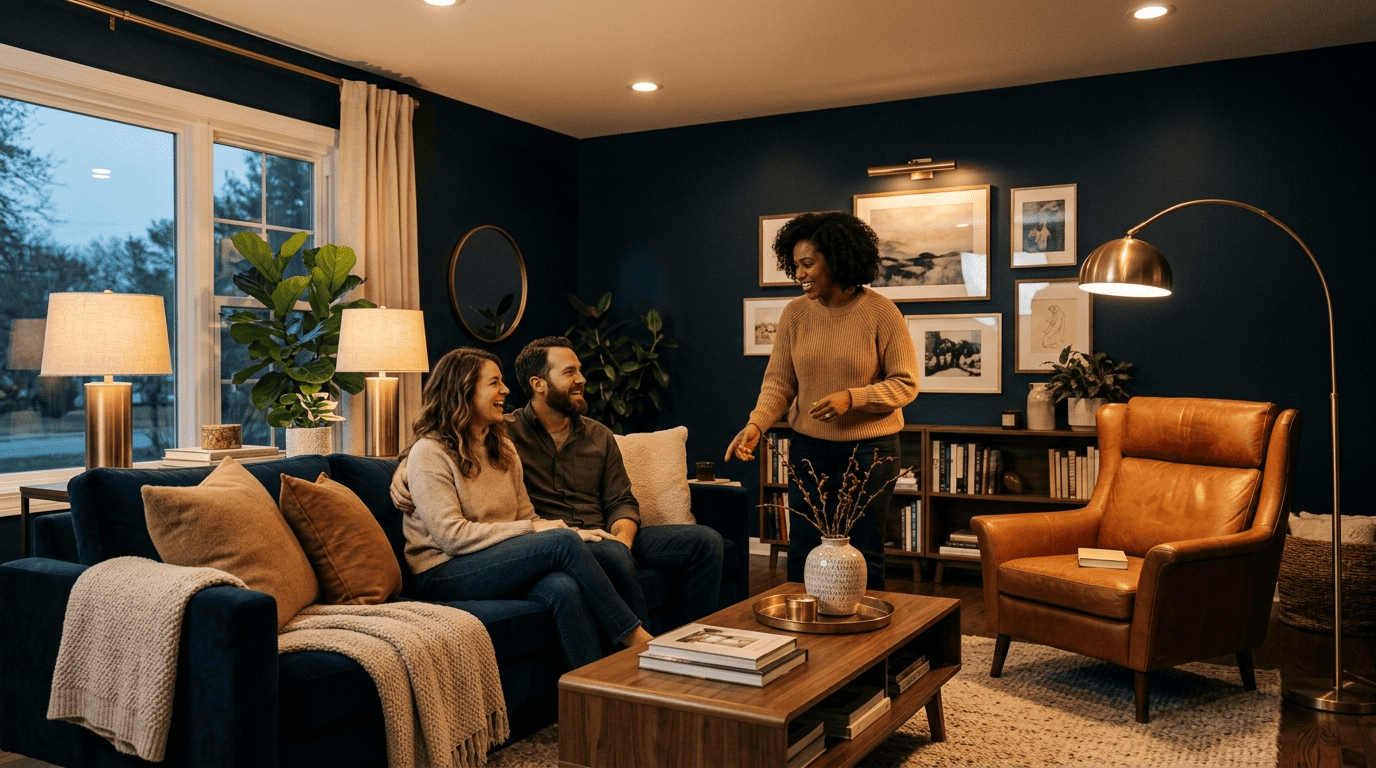
The goal is a room that shifts from bright and social to soft and cozy at the turn of a dial — and that starts with a plan, not a shopping cart.
The Three Layers of Living Room Lighting
Every living room that feels professionally lit is built from three layers working in concert, not one bright bulb doing all the work. Ambient, task, and accent light each solve a different problem, and skipping one is why so many rooms feel flat or over-lit no matter how many lamps get added.
Ambient, task, accent — what each does
Ambient lighting is the general, glare-free base of the room — recessed downlights, a chandelier, or a torchiere floor lamp that bounces light off the ceiling. It should let you walk through the space safely without squinting, but it is rarely enough on its own.
Task lighting is focused light aimed at a specific activity: reading, board games, laptop work on the coffee table. This is where table lamps and floor lamps earn their keep, since overhead light alone casts shadows exactly where you need clarity. Accent lighting adds drama — picture lights, uplights, or LED strips that highlight art, texture, or architecture rather than illuminating the whole room. Wikipedia’s entry on lighting frames this general/task/accent split as the standard way interior lighting is categorized.
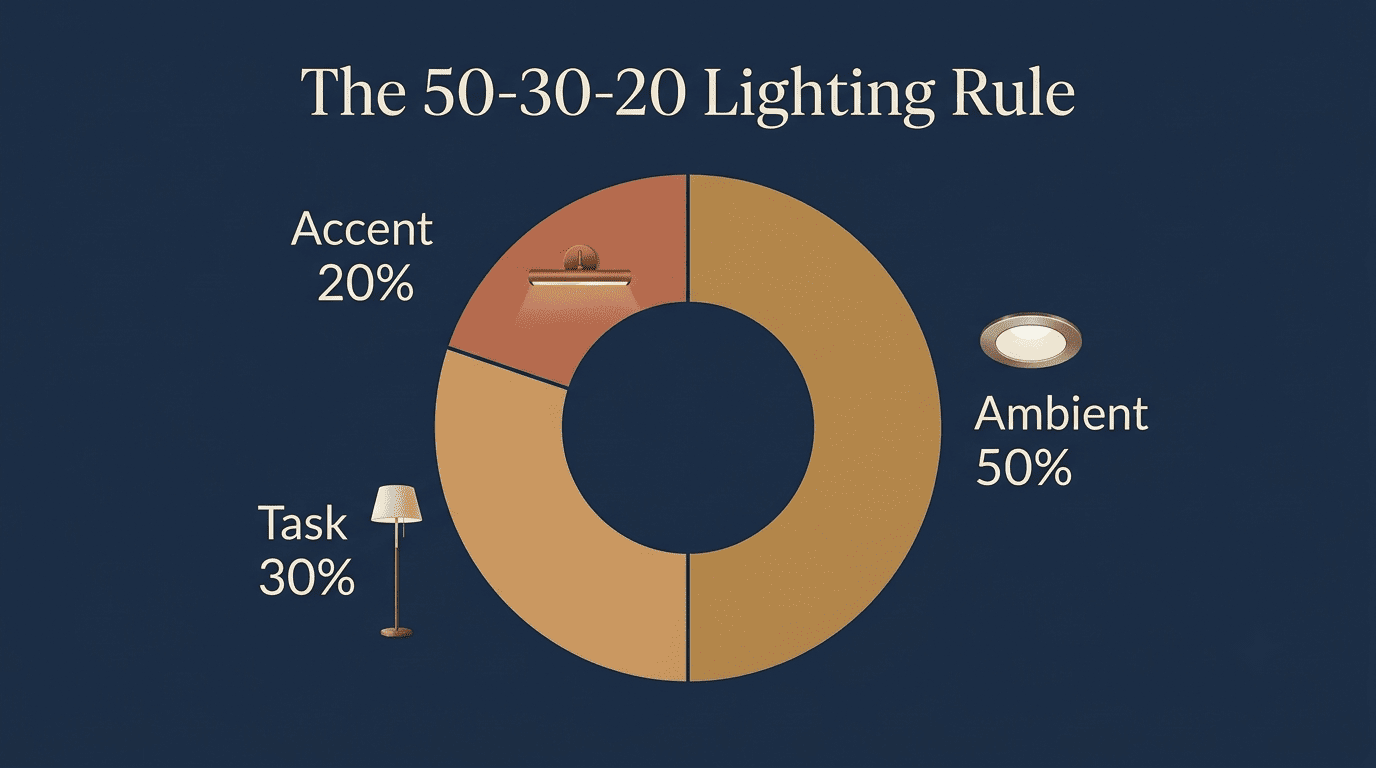
The 50-30-20 rule (and when to break it)
A common starting point for a living room plan is roughly 50% ambient, 30% task, and 20% accent light. It is a starting point, not a law — a reading-heavy room shifts toward 30/50/20 to favor task light, while a room built for entertaining can lean 40/10/50 to favor mood-setting accent light. Ambient light typically still makes up 50-60% of the total light in most living rooms, even after adjustment.
| Layer | Purpose | Typical fixtures | Share of light |
|---|---|---|---|
| Ambient | General, glare-free base illumination | Recessed lighting, chandelier, torchiere floor lamp | ~50-60% |
| Task | Focused light for reading, games, work | Table lamp, floor lamp, under-cabinet strip | ~20-30% |
| Accent | Highlights art, texture, architecture | Picture lights, wall sconce, uplight | ~10-20% |
Fixtures by Layer: Floor Lamps, Table Lamps, Sconces, Overhead, Arc
Once the layers are mapped, the next question is which physical fixtures actually deliver each one. Livingetc’s guide to layered lighting makes the point bluntly: relying on a single overhead fixture is the most common reason a living room feels sterile or unfinished, no matter how expensive the sofa is.
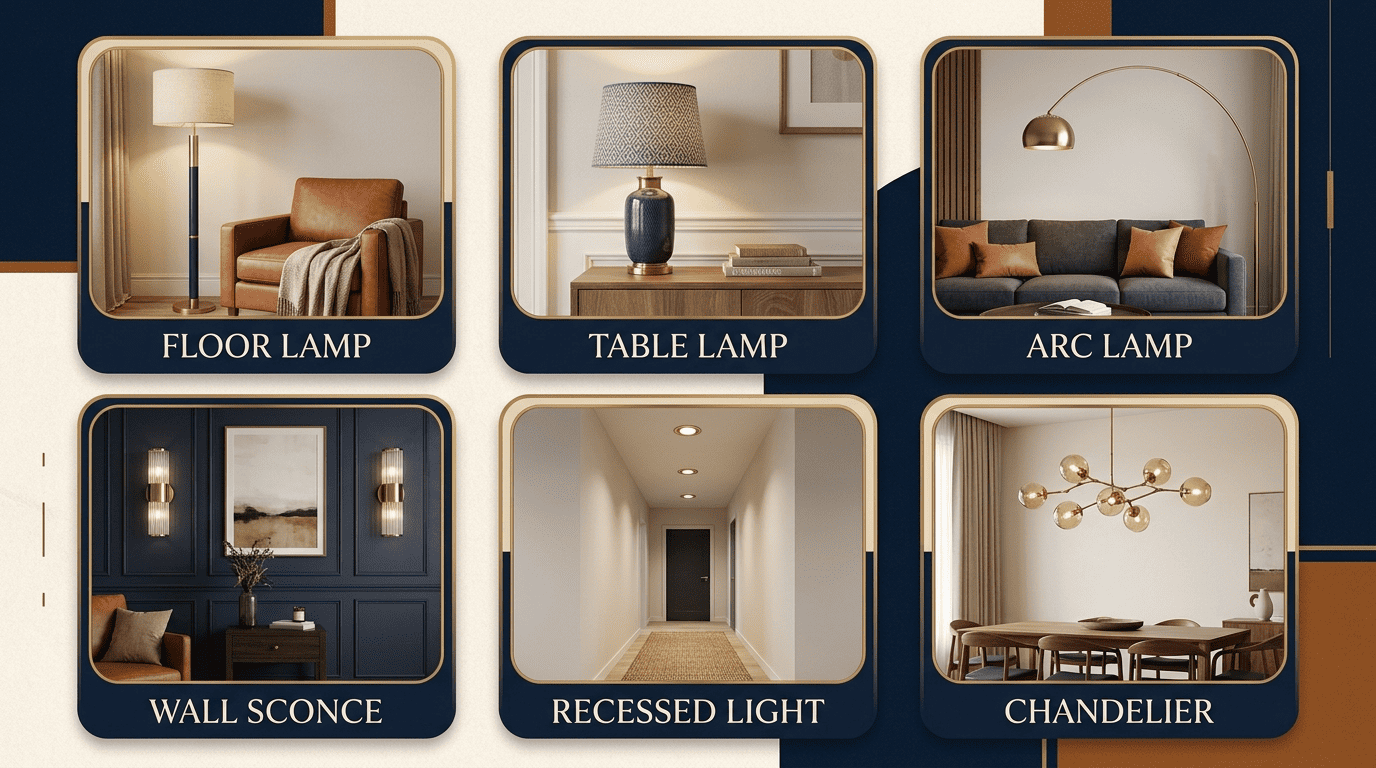
Overhead & ambient fixtures
These carry the ambient layer and set the room’s overall brightness floor.
- Recessed lighting — clean, low-profile downlights spread across the ceiling for even general light
- Chandelier or semi-flush mount — a central fixture that adds ambient light and visual anchor over a seating area
- Torchiere floor lamp — throws light upward to bounce softly off the ceiling instead of glaring downward
Task & accent fixtures
These do the close-up work ambient light can’t.
- Table lamps — paired on either side of a sofa or flanking a fireplace mantel for balanced, symmetrical light
- Adjustable floor lamps — positioned beside a reading chair or corner nook where overhead light won’t reach
- Arc lamps — arch gracefully over a sectional to deliver task light without a floor-standing base in the walkway
- Wall sconces — frame a fireplace or hallway with soft, even accent light at eye level
- Picture lights and LED strips — highlight artwork or shelving to add depth after dark
Color Temperature: Choosing Kelvin for the Right Mood
Color temperature is the single biggest lever for mood in a living room, and it’s measured in Kelvin, as explained in Wikipedia’s entry on color temperature. Living room lighting is built from three layers working together, and every one of those layers should be tuned to a consistent Kelvin range or the room will feel visually mismatched even when it’s bright enough.
The Kelvin scale, decoded
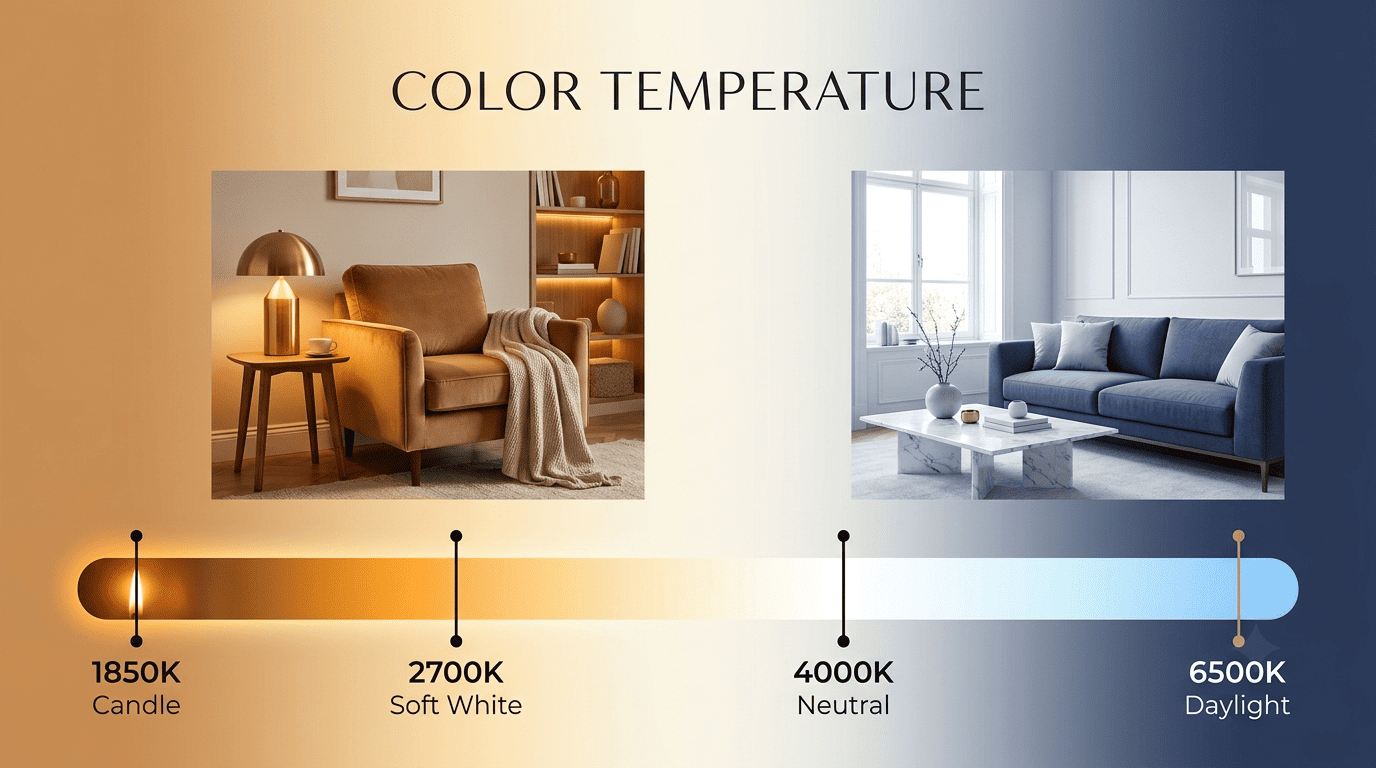
A candle flame sits around 1,850K, old incandescent bulbs run near 2,400K, and a “soft white” LED lands at 2,700K — all warm, amber tones. Move up the scale and a “cool white” LED sits near 4,000K, while daylight-balanced bulbs hit 6,500K, both reading as crisp, blue-white light. The rule is simple: lower Kelvin numbers look warmer and more amber, higher numbers look cooler and more blue.
Best Kelvin for a living room
Warm white 2700-3000K creates a cozy, relaxing mood, which is why it’s the near-universal recommendation for a living room’s ambient and task layers. A 4,000K neutral tone can work for an isolated task spot — a craft table or home office corner — but anything at 5,000K or above tends to feel clinical in a space meant for unwinding. Warmer light in the evening also supports the body’s natural wind-down toward sleep, so a scheme that shifts warmer as the night goes on does double duty.
| Kelvin | Appearance | Feels like | Best living-room use |
|---|---|---|---|
| ~1,850K | Deep amber | Candlelight | Accent/mood only, not primary light |
| 2,400K | Warm amber | Old incandescent bulb | Reference point, rarely used directly |
| 2,700-3,000K | Warm white | Cozy, relaxing | Ambient + task, the living room default |
| 4,000K | Neutral white | Crisp, office-like | Isolated task spot only |
| 6,500K | Cool blue-white | Daylight | Avoid for living rooms |
Bulb Choice: Lumens, CRI and LED Efficiency
Kelvin sets the color; lumens set the brightness — and the two get confused constantly at the hardware store.
Lumens over watts
Buy bulbs by lumens (actual brightness output), not watts, which only measures energy draw and says nothing about how much light you get. A typical living room needs roughly 1,500-3,000 lumens of total layered ambient light, plus about 400-800 lumens of dedicated task light at each reading seat. Try to keep the Kelvin consistent within a single layer — mixing a 2,700K lamp next to a 4,000K lamp in the same seating area reads as a mistake, not a design choice.
Why LED, and why CRI matters
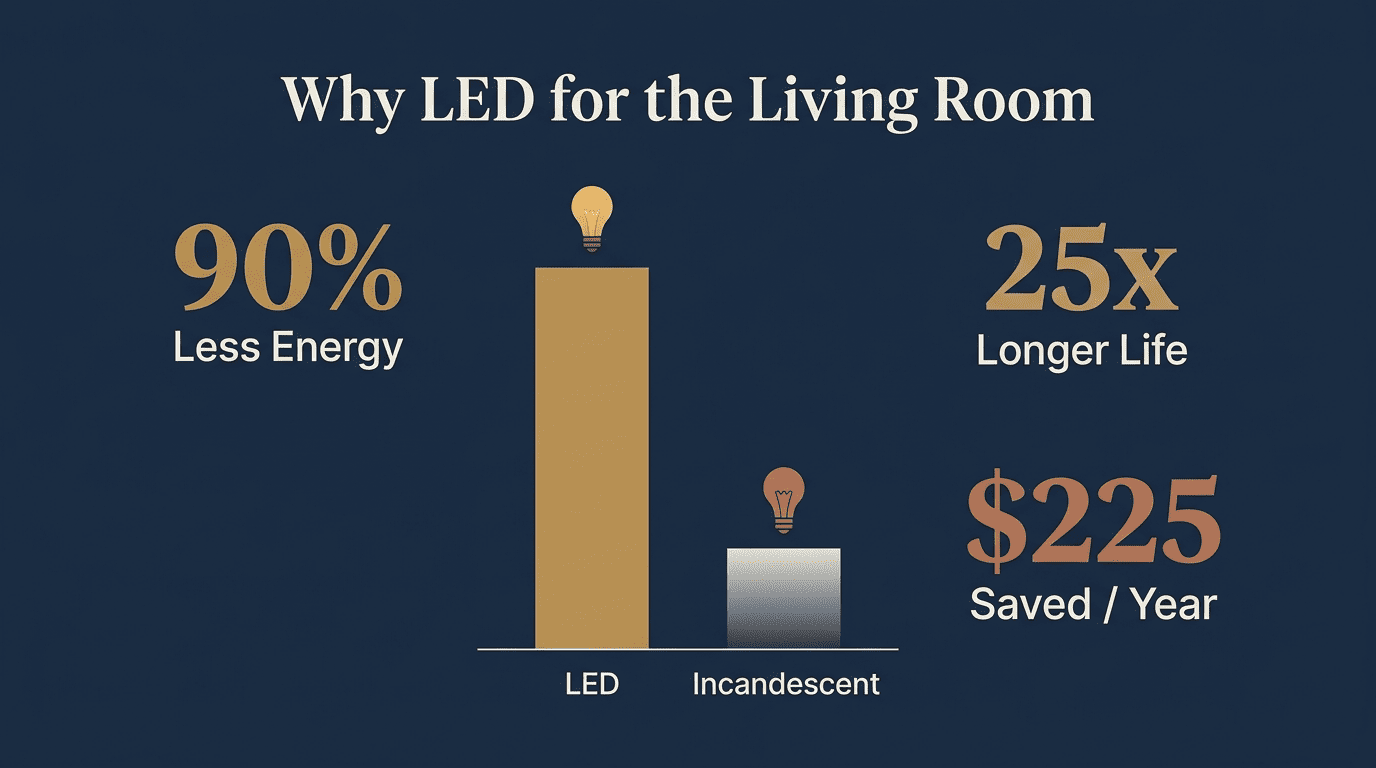
Choose LED across every layer, no exceptions. According to the Department of Energy’s guide to LED lighting, LEDs use up to 90% less energy than incandescent bulbs, last up to 25 times longer, and can save the average household around $225 a year in energy costs. They also generate very little heat, which matters for fixtures near fabric shades or artwork.
Check the CRI rating before buying. A Color Rendering Index of 90 or higher ensures wood tones, skin tones, and artwork colors render accurately under the bulb, rather than looking slightly washed out or off-hue the way many budget LEDs do.
- Match lumens to the layer’s job (ambient totals, task per-seat)
- Confirm Kelvin sits in the 2,700-3,000K range for ambient and task
- Look for CRI 90+ on the packaging or product spec sheet
- Check for “warm-dim” behavior if the bulb will sit on a dimmer
- Confirm the bulb is dimmable if it’s going on a dimmer switch at all
Dimmers and Scenes: Control the Mood
A perfectly layered, perfectly warm room still falls short without a dimmer to flex between daytime brightness and evening softness.
Put every layer on a dimmer
Dimmers are what let one room swing from bright-and-social during a gathering to candle-soft for a quiet evening, and Livingetc’s layered-lighting guidance treats separate dimming per layer as essential, not optional. Wiring ambient, task, and accent layers to independent switches or dimmers means each can be tuned to the moment instead of forcing an all-or-nothing choice. Many “warm-dim” LEDs shift toward a warmer color temperature as they’re dimmed, mimicking how an old incandescent bulb naturally behaved.
Smart scenes for the living room
Smart bulbs and switches let a whole layered scheme get saved as a one-tap preset instead of adjusting three dimmers by hand every time the mood changes.
- Movie — ambient and task off, accent low, just enough spill light to move around safely
- Reading — task lamp at full brightness beside the chair, ambient dimmed to reduce screen-style glare
- Entertaining — ambient and accent both up, task light minimal since the room is for conversation, not focus
- Evening wind-down — everything shifted to its warmest, dimmest setting to cue the body toward rest
How AI Visualizes Lighting in Your Actual Room
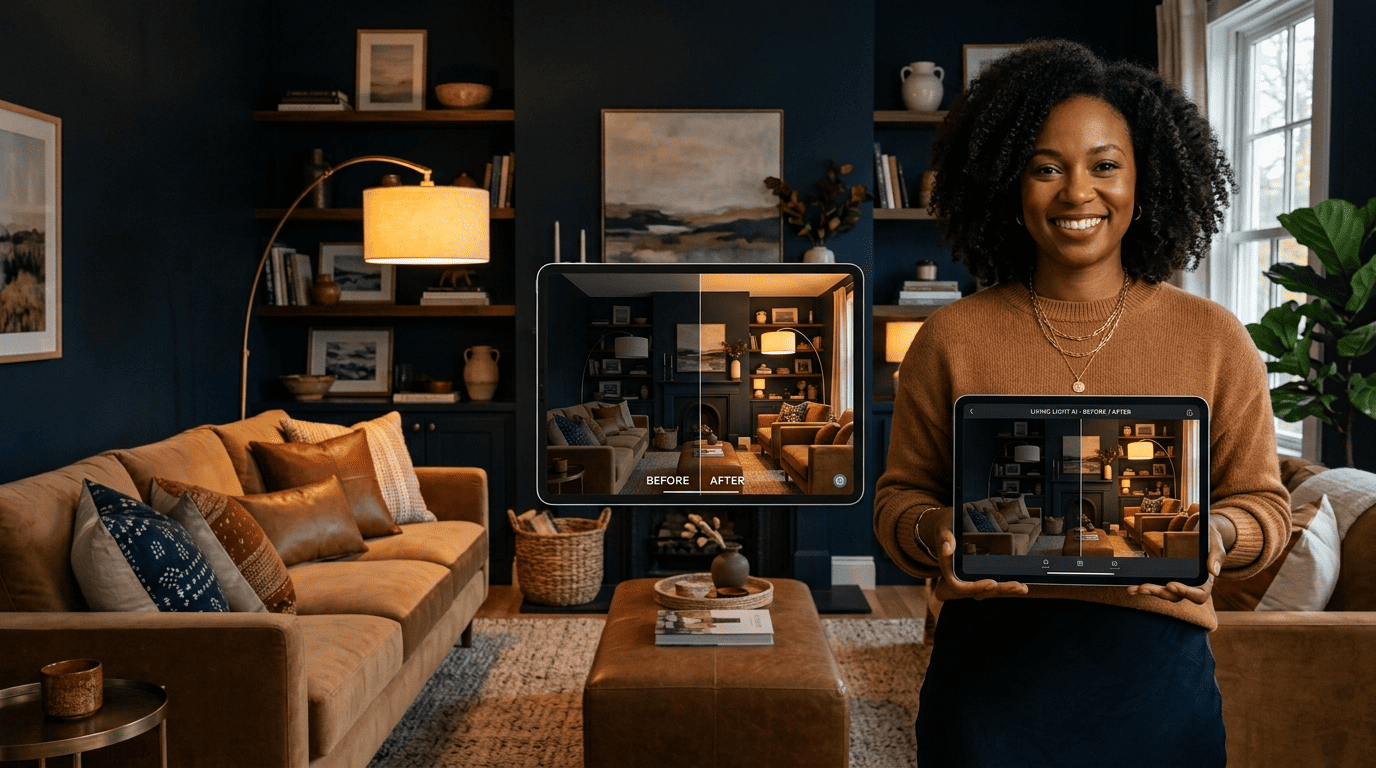
Reading about layers and Kelvin only goes so far — the real question is what two table lamps at 2,700K will actually look like beside your specific sofa. This is where an AI living room design ideas tool changes the process from guesswork to a side-by-side comparison.
From a phone photo to a lighting plan
Upload a photo of your actual living room, and the AI reads the room’s dimensions, existing layout, and current light sources before rendering changes directly onto that photo — added recessed lights, a new floor lamp in the corner, or a spotlight aimed at a piece of art. Because the render sits on your real room rather than a generic showroom shot, you can compare warm versus cool tones, one lamp versus three, or a chandelier versus recessed downlights entirely risk-free, before a single fixture ships to your door.
What to ask the AI for
Specific prompts get specific, usable results rather than a vague “make it cozier” render.
- “Add two table lamps at 2700K flanking the sofa”
- “Show a 50/30/20 ambient/task/accent layering in this room”
- “Render a warm-dim evening scene at low brightness”
- “Add recessed lighting across the ceiling, evenly spaced”
- “Put a picture light above the artwork over the fireplace”
Step-by-Step: Design Your Living Room Lighting with AI
Turning everything above into an actual finished room comes down to a short, ordered sequence rather than buying lamps at random.
- Map activities and zones — mark where you read, watch TV, or entertain, since each zone needs its own layer emphasis
- Set the ambient base first — plan overhead or torchiere light at 2,700-3,000K to cover roughly half the room’s total light
- Add task lamps where you actually read or work — table or floor lamps at each seat, matched in Kelvin to the ambient layer
- Layer in accent light — picture lights or uplights on art and architecture, kept to roughly 10-20% of total light
- Put every layer on its own dimmer or smart switch — so brightness can shift by activity and time of day
- Render the full plan in an AI room design tool and iterate — test fixture placement and Kelvin choices on a photo of the actual room before buying anything
- Buy fixtures and bulbs from the confirmed plan — shop by lumens and CRI, not watts, once the render matches what you want
LED lighting uses at least 75 percent less energy, and lasts up to 25 times longer, than traditional incandescent lighting.
U.S. Department of Energy, LED Lighting
That efficiency gap is exactly why LED belongs in every layer of a living room lighting plan, from the ambient recessed cans to the smallest accent picture light, whether the fixtures were chosen from a catalog or confirmed first in an AI render.