
AI Living Room Design From a Photo: How It Works and How to Get a Great Result
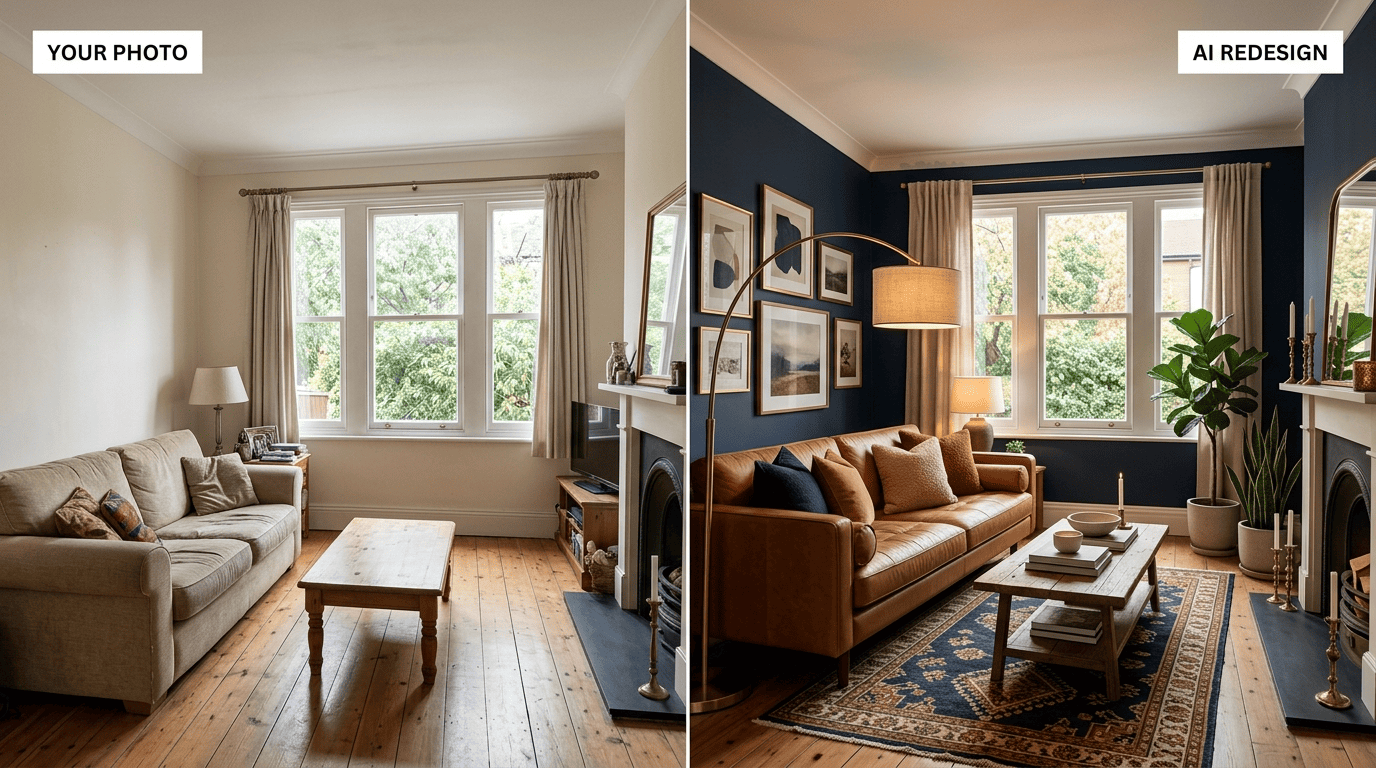
Yes — you can photograph your own living room and have software redesign it around that exact photo. AI living room design works by taking a picture of your actual space, then repainting the furniture, colors, and decor while keeping the walls, windows, and floor plan exactly where they are.

This is image-to-image generation, not “create a picture from scratch.” The room stays yours — only the styling changes, and a finished render typically appears in seconds.
How AI Living Room Design From a Photo Actually Works
Every tool in this space follows roughly the same technical path: it reads your photo as a starting canvas, works out what’s structural versus what’s decoration, and only repaints the second category. The output is a photorealistic image of your own room in a new style, not a generic stock render.
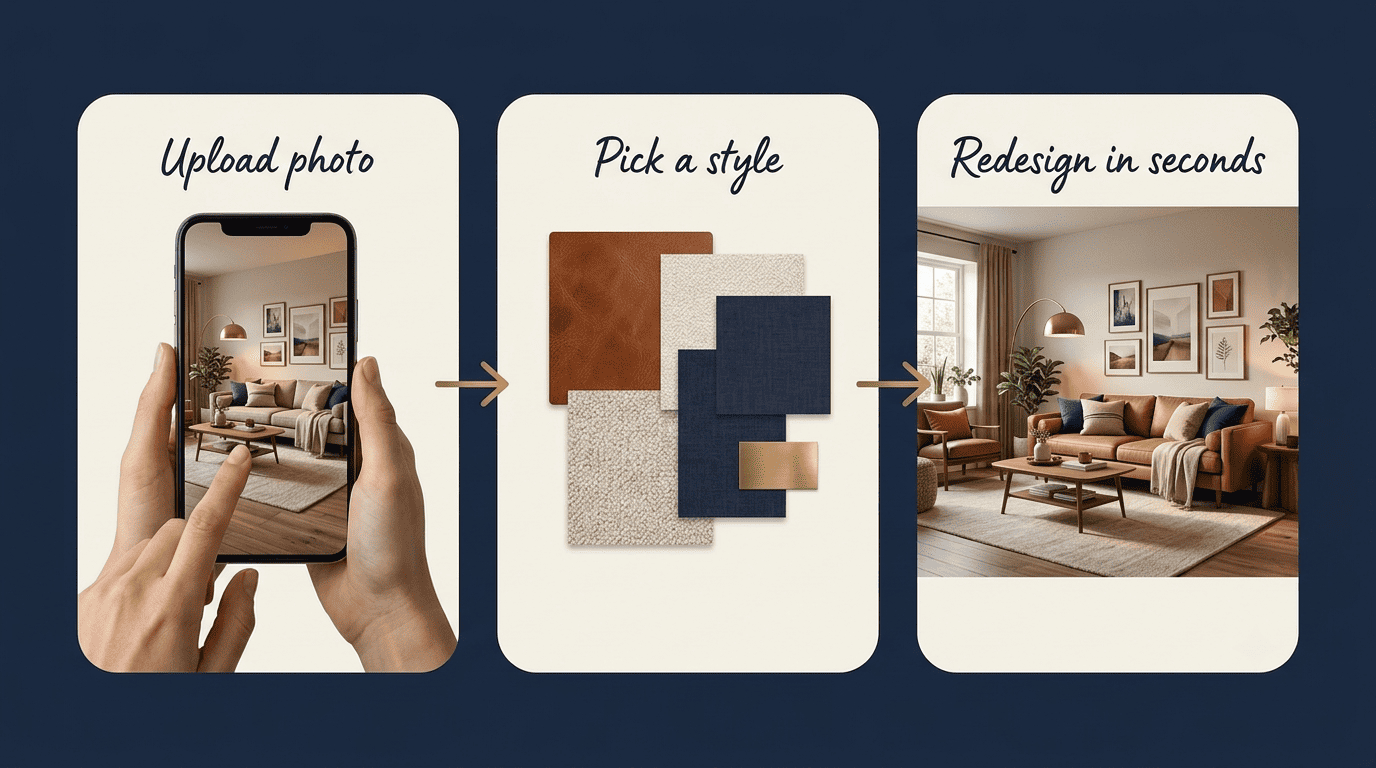
The three-step flow
The user-facing process is short and nearly identical across tools like RoomsGPT, Home Design AI, and Decoratly:
- Upload a photo of your living room (phone photos work fine).
- Choose a design style or describe the look you want.
- Get a photorealistic render — most tools return a result within seconds, with Remodel AI landing around 10 seconds.
That speed is the whole appeal: instead of hiring a designer and waiting days for a mood board, you get an immediate visual to react to, tweak, and regenerate.
What happens under the hood
Behind that three-click flow sits real computer vision. The model runs semantic segmentation to label which pixels are wall, floor, ceiling, window, and furniture, then applies depth estimation to understand how those surfaces sit in 3D space. Once the room’s structure is mapped through image segmentation, inpainting and a diffusion model repaint everything tagged as “furniture” or “decor” while leaving the structural pixels alone. A diffusion model is a generative process that learns to reconstruct an image by reversing a noise-adding process, which is why it can plausibly “fill in” a couch or rug that looks native to the lighting and perspective of your photo. None of this is magic; it’s applied computer vision layered with a generative model, and understanding that helps set realistic expectations for what the render can and can’t do.
Image-to-Image vs Text-to-Image: Why Your Room Stays Your Room
The reason a living room redesigner can promise “your actual room, new style” rather than “a nice living room” comes down to which family of generative model it uses.
The key difference
Tools built for redesigning a specific room take your uploaded photo as the base and edit it directly, versus a text-to-image model like Midjourney or DALL-E, which generates a picture purely from a written description with no photo input.
| Text-to-image (Midjourney, DALL-E) | Image-to-image (AI room redesign) | |
|---|---|---|
| Starting point | A text prompt only | A photo you upload |
| Your room’s geometry | Not preserved — invents a new space | Preserved — same walls, windows, layout |
| Best use case | Concept art, moodboards, inspiration | Redesigning a specific, existing room |
| Output relationship to your space | None — it’s a new, generic room | Same room, restyled |
This is why typing “cozy Scandinavian living room” into a text-to-image tool gives you a beautiful but unrelated room, while an image-to-image AI living room designer gives you back your room with a new sofa, palette, and finish.
How to Photograph Your Living Room for the Best Result
The single biggest lever on render quality isn’t the AI model — it’s the photo you feed it. A clear, well-lit shot preserves accuracy in the redesign; a rushed one gives the segmentation model less to work with.
What makes a good photo (checklist + table)
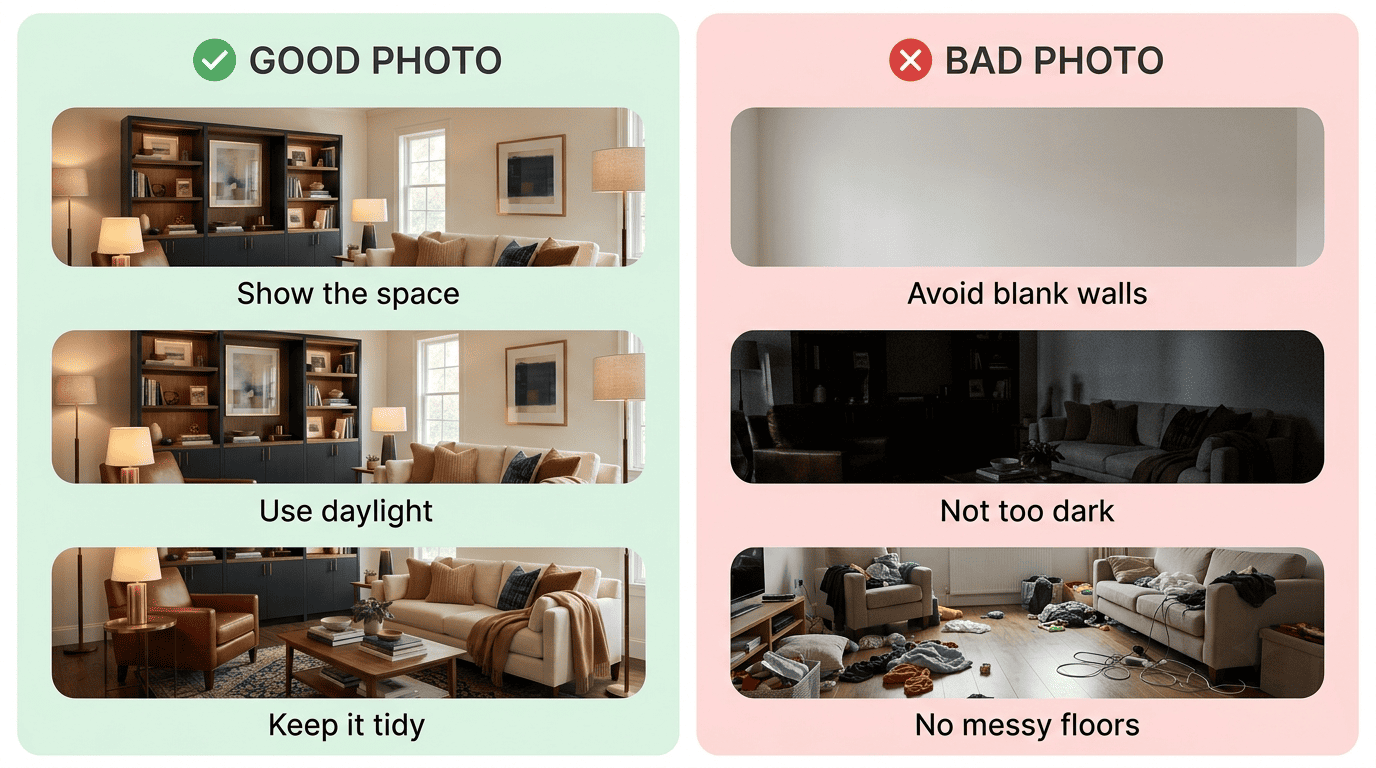
Before you upload, run through this quick checklist:
- Shoot from a corner or doorway so 2-3 walls and the floor are visible in one frame.
- Use daylight or turn on the overhead lights — avoid shooting in the dark.
- Keep the horizon level; don’t shoot at a steep upward or downward angle.
- Clear obvious clutter off the floor and main surfaces.
- Capture one room in one frame, not a hallway leading into it.
- A regular phone camera is enough — no special equipment needed. Most tools accept JPG, PNG, or JPEG files up to roughly 10MB.
| Good photo | Bad photo |
|---|---|
| Shot from a corner, showing 2-3 walls and the floor | Close-up of a single wall or object |
| Bright, even daylight or lights on | Dim or backlit, details lost in shadow |
| Surfaces reasonably clear | Cluttered floor, piles of items |
| Whole room in frame | Cropped fragment of the room |
| Sharp, in focus | Blurry or motion-smeared |
Do you need to declutter first?
A minimal tidy-up helps: clear, empty surfaces give the segmentation model a cleaner base to redraw furniture onto, so the “furniture” and “floor” boundaries are less ambiguous. That said, most tools also handle a fully furnished room and simply replace what’s there — some, like Remodel AI, also offer an empty-room mode built specifically for virtual staging when there’s no furniture to work around at all.
What AI Changes vs What It Keeps
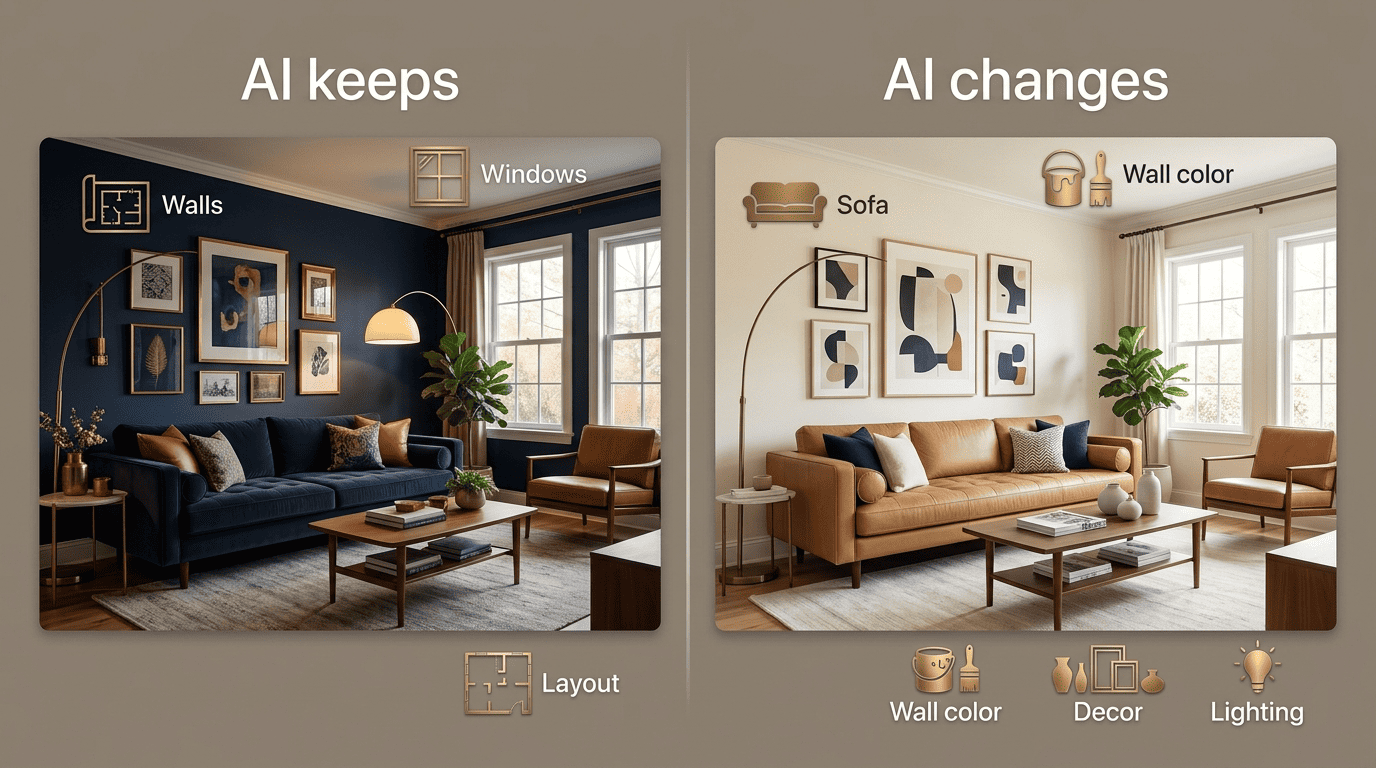
Understanding the split between fixed structure and editable decor is what makes the redesign trustworthy — it’s the difference between a tool that reshapes your actual living room and one that just generates a nice-looking room nearby.
The keeps-vs-changes table
| Stays the same (structure) | Gets changed (styling) |
|---|---|
| Walls | Sofa and furniture pieces |
| Windows and doors | Wall color |
| Ceiling lines | Flooring |
| Room proportions and layout | Textiles (curtains, rugs, cushions) |
| Viewing angle / sightlines | Decor and accessories |
| — | Light fixtures and overall style |
Architecture-aware tools go a step further than basic style transfer: ReimagineHome, for example, is built to respect door swings and sightlines rather than treating the whole photo as freely editable pixels. That distinction matters if you’ve ever seen a “redesign” that quietly moved a window — a well-built image-to-image tool shouldn’t do that.
Conservative mode vs full makeover
Several platforms let you choose how much freedom the AI gets. A conservative “enhance” mode strictly locks the architecture and only swaps furniture, color, and decor. A “makeover” mode, like the one Decoratly offers, is looser and may adjust windows, doors, or finishes for a more dramatic before-and-after. If your goal is an accurate redesign of the living room you actually own, pick the mode that preserves structure — save the looser mode for pure inspiration browsing.
That practical gap between a stylistic render and a construction-ready plan is exactly why the underlying practice is worth naming precisely. What most of these tools are doing to your furniture and decor is a form of virtual staging — using a graphic editor (in this case, an AI model) to place an interior design into an existing photo rather than the physical room itself.
Virtual home staging is a type of home staging in which an interior design is created in a graphic editor. Virtual staging is especially popular among real estate brokers, photographers, and interior designers.
Wikipedia, “Virtual home staging”
Iterating: How to Refine the AI Design Until You Love It
A single render is rarely the final answer — the real value of these tools is how cheap it is to try again.
Generate variations and compare
Generate several versions from the same photo. Because the render only takes seconds, there’s little cost to producing five or six variations of your living room instead of settling for the first one. Compare them side by side using a before-and-after slider to judge which direction actually reads better in your specific light and layout.

Change the style, palette, or intensity between runs. Adjust the color palette or how strongly the AI is allowed to deviate from the original, and cycle through style presets such as:
- Scandinavian
- Modern
- Japandi
- Bohemian
- Mid-Century
- Coastal
Top tools in this category offer anywhere from a few dozen to well over 60 style presets, so there’s real room to experiment before committing to one direction.
From render to real room (shoppable)
Some tools push past pure inspiration into a shopping list: ReimagineHome, for instance, links rendered furniture to real, purchasable products from retailers so you can shop the exact look. In that setup, the render doubles as a mood board and a starting shopping list rather than just a picture to admire — which shortens the gap between “I like this look” and actually furnishing the room. That’s the same underlying idea behind AI room design as a category: a redesign tool is most useful when it connects back to real, buyable decisions, not just a pretty image.
Realistic Expectations and Limitations
It’s worth being honest about where this technology is genuinely strong and where it still needs a human check.
What AI does well vs where it slips
- Style and atmosphere: excellent at showing what a color palette, material mix, or design era would feel like in your actual room.
- Fast “what if” exploration: lets you compare five different directions before spending a cent on paint or furniture.
- Exact scale and dimensions: weaker — furniture proportions can drift, so a sofa that looks right in the render may not be the size you actually need.
- Complex angles and reflective surfaces: mirrors, glass, and strong backlighting can confuse the segmentation step and produce odd artifacts.
- Guaranteed real-world fit: a render is a stylistic starting point, not a substitute for measuring your space, checking clearances, or briefing a contractor.
Treat the output as the opening move in a design decision, not the closing one — the measuring tape and the budget conversation still happen after the render, not instead of it.